How to Integrate or Create a PWA (Progressive Web App)
As promised in our previous post, “What is a Progressive Web App?“, this article will guide you step-by-step on how to integrate a Progressive Web App (PWA) into your existing or new website. By the end of this guide, you’ll have the tools and knowledge to transform your site into a fully functional PWA, offering users an app-like experience. Let’s get started!
Here’s what we’ll cover:
- Create a Manifest File: Learn how to define your PWA’s metadata, such as its name, icons, and display behavior, using a
manifest.jsonfile. - Register a Service Worker: Understand how to set up a service worker to enable offline functionality and caching for your PWA.
- Link the Manifest and Register the Service Worker: Add the manifest file and service worker to your HTML to make your website PWA-ready.
- Add an Install Prompt (Optional): Implement a custom install prompt to encourage users to add your PWA to their home screen or desktop.
- Test Your PWA: Use tools like Lighthouse to test your PWA and ensure it meets all requirements.
Here’s a step-by-step guide with code snippets to help you get started:
The code snippets have been tested and are well commented, so they should help you understand and modify the code as needed! Good Luck Buddy.🚀
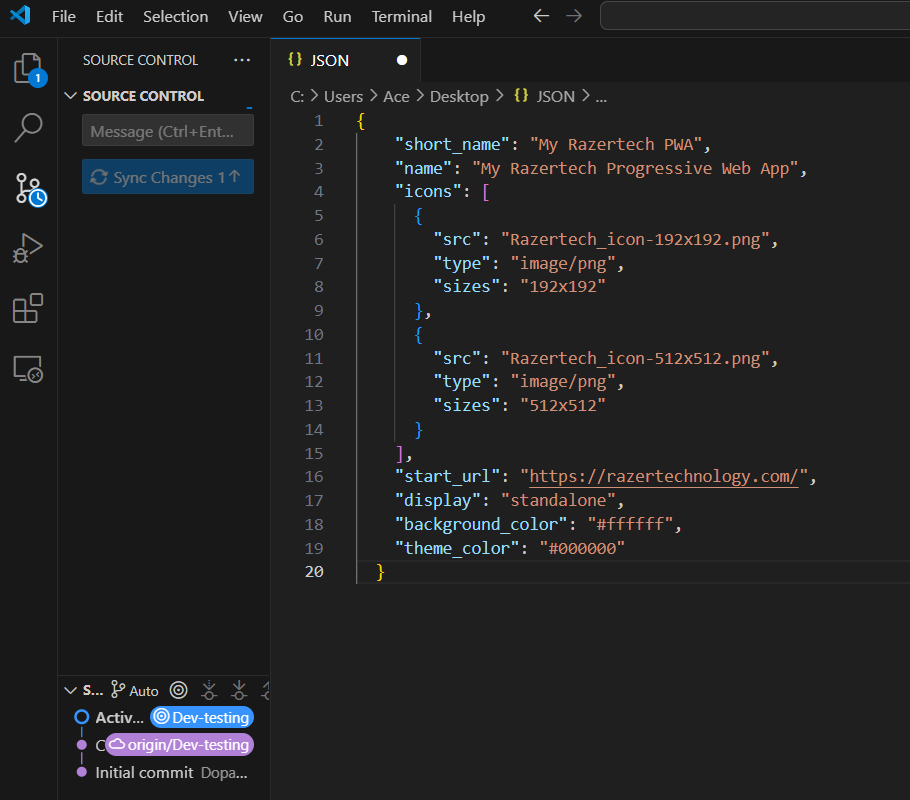
1. Create a Manifest File
The manifest.json file is essential for defining your PWA’s metadata, such as its name, icons, and display behavior.
{
  "short_name": "Razertech", // Short name for the app
  "name": "My Razertech Web App", // Full name of the app
  "icons": [
    {
      "src": "Razertech icon-192x192.png", // Path to the icon file
      "type": "image/png", // Icon file type
      "sizes": "192x192" // Icon size
    },
    {
      "src": "Razertech icon-512x512.png", // Path to the larger icon file
      "type": "image/png", // Icon file type
      "sizes": "512x512" // Icon size
    }
  ],
  "start_url": "https://razertechnology.com/", // The URL to load when the app starts
  "display": "standalone", // How the app should be displayed (standalone, fullscreen, etc.)
  "background_color": "#ffffff", // Background color for the splash screen
  "theme_color": "#110ec5" // Theme color for the app
}
2. Register a Service Worker
A service worker enables offline functionality and caching. Create a service-worker.js file:
// Define the cache name and files to cache
const CACHE_NAME = 'my-Razertech pwa-cache-v1';
const urlsToCache = [
  '/', // Cache the root URL
  '/styles/main.css', // Cache CSS files
  '/scripts/main.js', // Cache JavaScript files
  '/images/Razertech_logo.png' // Cache images
];

// Listen for the 'install' event to cache files
self.addEventListener('install', (event) => {
  event.waitUntil(
    caches.open(CACHE_NAME) // Open the cache
      .then((cache) => cache.addAll(urlsToCache)) // Cache all specified files
  );
});

// Listen for the 'fetch' event to serve cached files
self.addEventListener('fetch', (event) => {
  event.respondWith(
    caches.match(event.request) // Check if the request is in the cache
      .then((response) => response || fetch(event.request)) // Serve from cache or fetch from network
  );
});
3. Link the Manifest and Register the Service Worker
Add the manifest file and register the service worker in your HTML:
<!DOCTYPE html>
<html lang="en">
<head>
  <meta charset="UTF-8">
  <meta name="viewport" content="width=device-width, initial-scale=1.0">
  <title>My PWA</title>
  <!-- Link to the manifest file -->
  <link rel="manifest" href="/manifest.json">
</head>
<body>
  <h1>Welcome to My Razertech PWA</h1>
<h2>
The home of SaaS, Tech, Design & Digital marketing solutions
 </h2>
  <script>
    // Check if the browser supports service workers
    if ('serviceWorker' in navigator) {
      // Register the service worker
      navigator.serviceWorker.register('/service-worker.js')
        .then((registration) => {
          console.log('Service Worker registered with scope:', registration.scope);
        })
        .catch((error) => {
          console.error('Service Worker registration failed:', error);
        });
    }
  </script>
</body>
</html>
4. Add an Install Prompt (Optional)
To encourage users to install your PWA, you can trigger an install prompt:
let deferredPrompt; // Variable to store the install prompt event

// Listen for the 'beforeinstallprompt' event
window.addEventListener('beforeinstallprompt', (event) => {
  event.preventDefault(); // Prevent the default prompt
  deferredPrompt = event; // Store the event for later use
  // Show your custom install button or prompt here
});

// Add a click event listener to your custom install button
document.getElementById('installButton').addEventListener('click', () => {
  if (deferredPrompt) {
    // Trigger the install prompt
    deferredPrompt.prompt();
    // Wait for the user to respond to the prompt
    deferredPrompt.userChoice.then((choiceResult) => {
      if (choiceResult.outcome === 'accepted') {
        console.log('User accepted the install prompt');
      } else {
        console.log('User dismissed the install prompt');
      }
      deferredPrompt = null; // Clear the deferred prompt
    });
  }
});
5. Test Your PWA
- Use Lighthouse in Chrome DevTools to test your PWA.
- Ensure your site is served over HTTPS (required for PWAs).